Linux 2.6.33 features for embedded systems

Interesting features for embedded Linux system developers

Penguin workerLinux 2.6.33 was out on Feb. 24, 2010, and to incite you to try this new kernel in your embedded Linux products, here are features you could be interested in.

The first news is the availability of the LZO algorithm for kernel and initramfs compression. Linux 2.6.30 already introduced LZMA and BZIP2 compression options, which could significantly reduce the size of the kernel and initramfs images, but at the cost of much increased decompression time. LZO compression is a nice alternative. Though its compression rate is not as good as that of ZLIB (10 to 15% larger files), decompression time is much faster than with other algorithms. See our benchmarks. We reduced boot time by 200 ms on our at91 arm system, and the savings could even increase with bigger kernels.

This feature was implemented by my colleague Albin Tonnerre. It is currently available on x86 and arm (commit, commit, commit, commit), and according to Russell King, the arm maintainer, it should become the default compression option on this platform. This compressor can also be used on mips, thanks to Wu Zhangjin (commit).

For systems lacking RAM resources, a new useful feature is Compcache, which allows to swap application memory to a compressed cache in RAM. In practise, this technique increases the amount of RAM that applications can use. This could allow your embedded system or your netbook to run applications or environments it couldn’t execute before. This technique can also be a worthy alternative to on-disk swap in servers or desktops which do need a swap partition, as access performance is much improved. See this LWN.net article for details.

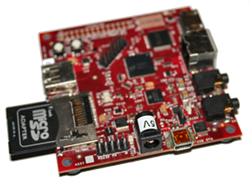
This new kernel also carries lots of improvements on embedded platforms, especially on the popular TI OMAP platform. In particular, we noticed early support to the IGEPv2 board, a very attractive platform based on the TI OMAP 3530 processor, much better than the Beagle Board for a very similar price. We have started to use it in customer projects, and we hope to contribute to its full support in the mainline kernel.

Another interesting feature of Linux 2.6.33 is the improvements in the capabilities of the perf tool. In particular, perf probe allows to insert Kprobes probes through the command line. Instead of SystemTap, which relied on kernel modules, perf probe now relies on a sysfs interface to pass probes to the kernel. This means that you no longer need a compiler and kernel headers to produce your probes. This made it difficult to port SystemTap to embedded platforms. The arm architecture doesn’t have performance counters in the mainline kernel yet (other architectures do), but patches are available. This carries the promise to be able to use probe tools like SystemTap at last on embedded architectures, all the more if SystemTap gets ported to this new infrastructure.

Other noticeable improvements in this release are the ability to mount ext3 and ext2 filesystems with just an ext4 driver, a lightweight RCU implementation, as well as the ability to change the default blinking cursor that is shown at boot time.

Unfortunately, each kernel release doesn’t only carry good news. Android patches got dropped from this release, because of a lack of interest from Google to maintain them. These are sad news and a threat for Android users who may end up without the ability to use newer kernel features and releases. Let’s hope that Google will once more realize the value of converging with the mainline Linux community. I hope that key contributors that this company employs (Andrew Morton in particular) will help to solve this issue.

As usual, this was just a selection. You will probably find many other interesting features on the Linux Changes page for Linux 2.6.33.

Embedded Linux practical labs with the Beagle Board

Note: the materials for training with the Beagle Board are no longer available, and would be significantly out of date anyway. We advise you to check our Embedded Linux System Development and Linux Kernel and Driver Development training courses for up-to-date instructions that work on cheaper boards, which are still available on the market today. And if you still have an old Beagle board, it will be an interesting exercise to adapt our current labs to run them on such hardware.

We were asked to customize our embedded Linux training session with specific labs on OMAP 3530 hardware. After a successful delivery on the customer site, using Beagle boards, here are our training materials, released as usual under the terms of the Creative Commons Attribution-ShareAlike 3.0 license:

If you are the happy owner of such a board (both attractive and cheap), or are interested in getting one, you can get valuable embedded Linux experience by reading our lecture materials and by taking our practical labs.

Here’s what you would practise with if you decide to take our labs:

  • Build a cross-compiling toolchain with crosstool-NG
  • Compile U-boot and the X-loader and install it on MMC and flash storage.
  • Manipulate Linux kernel sources and apply source patches
  • Configure, compile and boot a Linux kernel for an emulated PC target
  • Configure, cross-compile and boot a Linux kernel on your Beagle Board
  • Build a tiny filesystem from scratch, based on BusyBox, and with a web server interface. Practice with NFS booting.
  • Put your filesystem on MMC storage, replacing NFS. Practice with SquashFS.
  • Put your filesystem on internal NAND flash storage. Practice with JFFS2 too.
  • Manually cross-compile libraries (zlib, libpng, libjpeg, FreeType and DirectFB) and a DirectFB examples, getting familiar with the tricks required to cross-compile components provided by the community.
  • Build the same kind of graphical system automatically with Buildroot.
  • Compile your own application against existing libraries. Debug a target application with strace, ltrace and gdbserver running on the target.
  • Do experiments with the rt-preempt patches. Measure scheduling latency improvements.
  • Implement hotplugging with mdev, BusyBox’s lightweight alternative to udev.

Note that the labs were tested with Rev. C boards, but are also supposed to work fine with Rev. B ones. You may also be able to reuse some of our instructions with other boards with a TI OMAP3 processor.

Of course, if you like the materials, you can also ask your company to order such a training session from us. We will be delighted to come to your place and spend time with you and your colleagues.

Building Android on Beagle

Note: these instructions are now out of date and refer to URLs which no longer exist. See the elinux.org wiki for more recent instructions.

These instructions are derived from Embinux.org’s Android Porting Guide to Beagle Board (the corresponding web page no longer exists), based on their work to port Android on the Beagle board. They correct multiple inaccuracies in this guide, and also add many useful details.

These instructions were tested on xubuntu 9.04. There shouldn’t be many differences if you use other recent Ubuntu or Debian versions.

Install needed software packages

At the time of this writing, note that Android requires Sun’s Java5 JDK, and doesn’t support the Java6 one.

apt-get update
apt-get dist-upgrade
apt-get install git-core bison sun-java5-jdk flex g++ zlib1g-dev
apt-get install  libx11-dev libncurses5-dev gperf uboot-mkimage

Android also uses its own repo script as a git front-end:

mkdir -p ~/bin
cd ~/bin
curl https://dl-ssl.google.com/dl/googlesource/git-repo/repo > repo
chmod +x repo

We are also going to need a 2007q3 toolchain from Code Sourcery

cd
wget http://www.codesourcery.com/sgpp/lite/arm/portal/package1787/public/arm-none-linux-gnueabi/arm-2007q3-51-arm-none-linux-gnueabi-i686-pc-linux-gnu.tar.bz2
cd /opt
sudo tar jxf arm-2007q3-51-arm-none-linux-gnueabi-i686-pc-linux-gnu.tar.bz2

You could also get this toolchain from our website:

cd
wget /pub/demos/beagleboard/android/arm-2007q3-51-arm-none-linux-gnueabi-i686-pc-linux-gnu.tar.lzma
cd /opt
sudo tar --lzma -xf ~/arm-2007q3-51-arm-none-linux-gnueabi-i686-pc-linux-gnu.tar.lzma

Download sources

Our instructions create a directory in your home directory, but of course, it can be placed anywhere!

 mkdir ~/beagledroid
 cd ~/beagledroid
 repo init -u git://labs.embinux.org/repo/android/platform/beaglemanifest.git/
 repo sync

Caution: this can take a lot of time, as this downloads and extracts 2.4 GB of data. On a fast workstation with a 500KB/s Internet connection, it took about 90 minutes.

Building Android

make

If your workstation has multiple CPUs, you could save a lot of time by running multiple jobs in parallel:

make -j 4

On our machine, this took about 4 hours!

Building the kernel

export CC_PATH=/opt/arm-2007q3/bin/arm-none-linux-gnueabi-
cd ~/beagledroid/kernel
../vendor/embinux/support-tools/beagle_build_kernel.sh

Copying the Android root filesystem

Android’s root file system is generated in ~/beagledroid/out/target/product/generic

cd ~/beagledroid/out/target/product/generic
mkdir ~/beagledroid/rootfs
cp -a root/* ~/beagledroid/rootfs/
cp -a system/* ~/beagledroid/rootfs/system/
cd ~/beagledroid/rootfs
sudo chown -R root.root .
sudo chmod -R a+rwX data system 

Formatting an MMC/SD card

First connect your card reader to your workstation, with the MMC/SD card inside. Type the dmesg command to see which device is used by your workstation. Let’s assume that this device is /dev/sdb

Type the mount command to check your currently mounted partitions. If MMC/SD partitions are mounted, unmount them.

In a terminal edit partitions with fdisk:

sudo fdisk /dev/sdb

Delete any existing partition with the d command.

Now, create the boot partition:

Command (m for help): n 
Command action 
   e   extended 
   p   primary partition (1-4) 
p 
Partition number (1-4): 1 
First cylinder (1-239, default 1): 1 
Last cylinder, +cylinders or +size{K,M,G} (1-239, default 239): +64M

Change its type to FAT32:

Command (m for help): t
Selected partition 1
Hex code (type L to list codes): c
Changed system type of partition 1 to c (W95 FAT32 (LBA))

Using the n command again, create a second partition filling up the rest of your card (just accept default values).

Now, format the partitions in your card:

sudo mkfs.vfat -n beagleboot -F 32 /dev/sdb1
sudo mkfs.ext3 /dev/sdb2

Remove and insert your card again. Your new partitions should be mounted automatically.

Copying data to the MMC/SD card

Start by copying the X-loader and U-boot on the first partition.

cd /media/beagleboot
wget /pub/demos/beagleboard/android/MLO
/pub/demos/beagleboard/android/u-boot.bin
cp ~/beagledroid/kernel/arch/arm/boot/uImage .

Now copy the Android root filesystem to the second partition (assuming it is mounted on /media/disk:

sudo rsync -a ~/beagledroid/rootfs/ /media/disk/

Finish by unmounting your MMC/SD partitions:

sudo umount /media/beagleboot
sudo umount /media/disk

Boot setup

The last thing left to do is to specify how the board boots Linux.

Plug the Beagle board on your computer, and also connect it to a DVI-D monitor. Start minicom (corresponding to Hyperterminal in Windows) on /dev/ttyS0, or on /dev/ttyUSB0 if you are using a serial to USB adapter. Power up the board.

First, stop Minicom from truncating long lines by typing [Ctrl] [a] followed by z and w.

In the U-boot prompt, make the board boot automatically on the MMC/SD card:

setenv bootcmd 'mmc init;fatload mmc 0 80000000 uImage;bootm 80000000'
saveenv

Now set the kernel command line arguments:

setenv bootargs console=ttyS2,115200n8 noinitrd root=/dev/mmcblk0p2 video=omapfb.mode=dvi:1280x720MR-24@50 init=/init rootfstype=ext3 rw rootdelay=1 nohz=off androidboot.console=ttyS2

You may need to adapt the video settings to the capabilities of your DVI display. You should now see Android boot!

Beagle board MMC boot myths?

Booting a Beagle board from an MMC/SD should be easier than what people tell you

Beagle boardAt the time of this writing, most documentation that you can find on the web about the Beagle board will tell you that you need to take special preparation steps if you wish to boot your board on an MMC/SD card:

  • The card requires a special geometry: 255 heads and 63 sectors per track
  • The first partition on the card, with a FAT type, must be marked as bootable
  • The X-loader (MLO file), must be copied to the first sectors of the first partition. As a consequence, you should copy this file first.

As my colleague Florent Peyraud and TI engineers started to suspect, all this is not always required. I’ve just made tests with my Rev C2 Beagle board:

  • I took a brand new MMC/SD card. fdisk showed that it had 57 heads and 56 sectors per track.
  • I created the partitions again, and didn’t flag the first one as bootable.
  • After formatting the first partition in FAT32 format, I first copied the u-boot.bin and uImage files, and then the MLO one.

After all this, I had no problem booting my Beagle board on the MMC/SD card. At least with my Rev C2 board, what TI engineers expected was true: the board romcode understood the FAT format, and therefore just needed a file with the MLO name, whatever its physical location on the card.

Does anyone know whether the requirements used to be true with earlier Beagle board romcode releases, or in special cases?